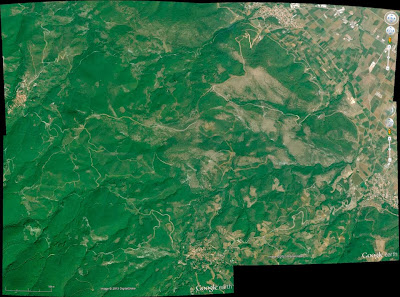
One can combine successive
caption of GoogleEarth/GoogleMaps but stitching them together is impossible.
The reason is that Google,
and any other topo service,e projects earth’s curvature in a flat plane (your
screen, a map or a photo image). And that makes for some distortion around the
edges and the corners in particular.
So if you are to import
the captured images into a photo editing software with the hopes of making a larger
map you are out of luck. You can try it but you will soon be disappointed with
your nerves wrecked, just like we did!
A demo of the conflict areas
Enter the photographic Panorama stitching software.
These apps search for
similar areas in consecutive images and distort, cut and paste them together.
If you are careful with your images and they have some good overlapping areas,
you gonna get a seamless final product.
Important Note: this is
final “map” will be for sight reference and visual orientation. It is not for
compass and GPS use, since it will be somehow distorted.
The are many too choose
form but we suggest the simplest of them all, Autostitch.
The Process
You enter
googlemaps/earth and you find the area of interest.
Higher magnification is always
preferable so you will start making incremental views of your area. Take care
to leave a margin of about 10-15% around each image that will be expendable.
This will be used by the stitching software to merge the images and will take
care of all the not needed details that are on the fringes.
Note: we did not have
good luck with stitching many partial views. The curvature and distortions add
up. We suggest you limit your stitching to 4 pieces (2 up and 2 down) only.
Now, there are two ways
to capture your partial images.
1. Use Google Earth’s own feature
Google
Earth’s screen capture in .jpeg
2. Use the PrintScreen button
on your keyboard and paste the capture in a photo editing software. This gives
a better quality image but you will get the screen frindges too which you will
have to crop out with the photo editor.
For reference you can use
Photoshop, ACDSee or the freeware Irfanview
software for cropping and image adjustments
A
print screen capture or our area of interest. We have also indicated the button
that allows Google captures in Google earth
Once you have the parts
ready, you apply the stitching software and you get your raw map
Enhancing your map
There are many things you
can do with the use of a photo editor.
Trace lines, color a
route, add water landmarks, adjust image color, insert legends and photos of
important crossroads.
This is the end map with
the unneeded areas cropped out
Then we chose to make our
map Black&White but we also enhanced the final (grey) colors, and retraced
ALL the roads of the area which is wooded mostly and not all roads are showing.
This is a comparison
image of our enhancements. On the right is a color adjusted section, on the
middle is a simple B&W conversion and on the left we tinkered with the
B&W adjustments in Photoshop to improve the shaded areas.
In this image there is a
comparison of the line work we did with the Photoshop drawing tool. We traced
new road lines on the image. In the top left corner you can see the original,
on the right the new lines and on the lower left the lines readjusted to show less.
And this is the final
product, ready to trace in color our selected routes and landmarks by hand.
We hope you found this
demo useful and not too technical. Try it yourself!


Δεν υπάρχουν σχόλια:
Δημοσίευση σχολίου